
How to Get Rid of the Perspective Grid in Illustrator
Hey there! If you’ve landed here, chances are you’re wrestling with Adobe Illustrator’s perspective grid . You’re definitely not alone in this. It turns out, one of the most common questions popping up from Illustrator beginners is how to get rid of the perspective grid. The culprit? A very tiny “X” icon.
1. Select the Perspective Grid
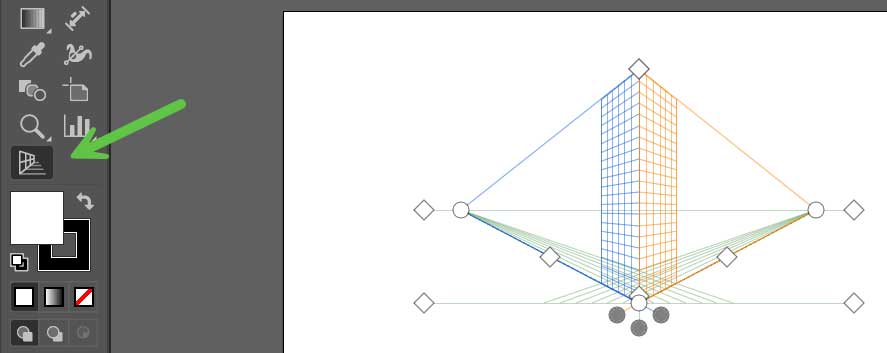
To activate and select the perspective grid, click on the Perspective Grid Tool icon in the vertical toolbar. This tool is typically represented by a grid symbol. Once selected, the perspective grid will appear on your artboard, and your cursor will change to indicate that you’re in perspective manipulation mode.
2. Use the ‘X’ Button
Find the tiny “X” at the top left of the Plane Switching widget, located at the upper-left corner of the perspective grid. Hovering your cursor over this “X” might require precision due to its small size, so it could take several tries to get it right. When your cursor changes to a hand icon and a tooltip saying “Hide Grid” appears, you are correctly positioned. Click the “X” at this point to hide the perspective grid from your workspace.
Alternative (and maybe easier) Methods to Get Rid of the Perspective Grid
- Press Shift + Ctrl + I (Windows) or Shift + Cmd + I (Mac) to quickly toggle the perspective grid on or off.
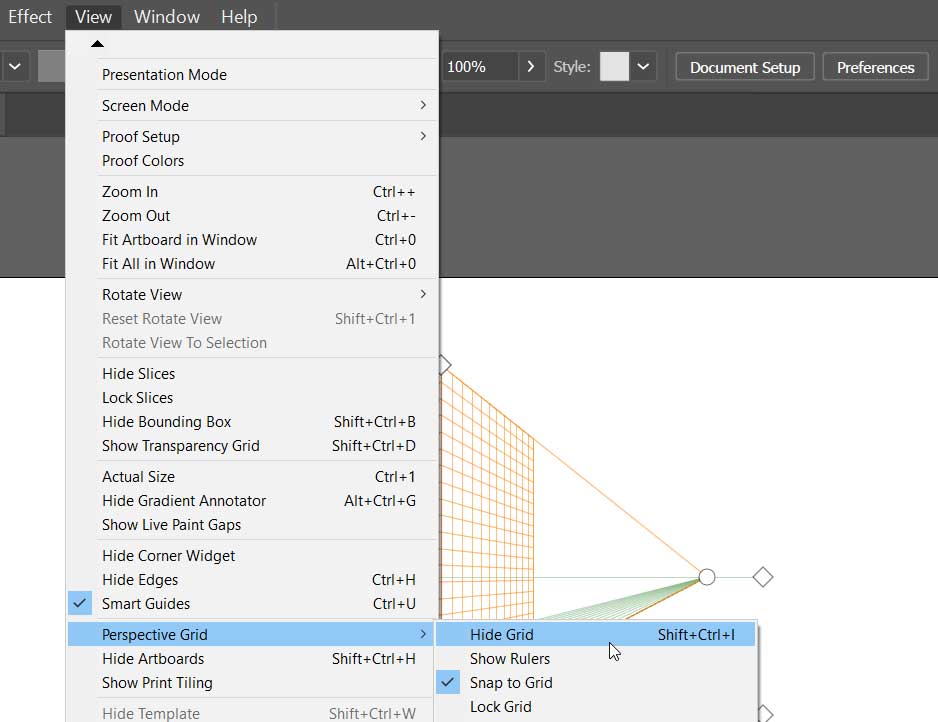
- Navigate to the View menu, find Perspective Grid, and choose Hide Grid for a menu-driven approach.